table- add+delete
Good Morning Students
Let us look at the concept of Table making in MS Word
---------------------------------------------------------------------------------
The Google meet ID for today's session is:
------------------------------------------------------------------
By the end of today's session, you will be able to :
- create a table as per given specifications
- Format the table as per given specifications
- Add /delete rows and columns.
- Merge rows and columns in a table.
Create a Table in Word
In this chapter, we will discuss how to create a table in Word 2010. A table is a structure of vertical columns and horizontal rows with a cell at every intersection. Each cell can contain text or graphics, and you can format the table in any way you want. Usually the top row in the table is kept as a table header and can be used to put some informative instruction.
Create a Table
The following steps will help you understand how to create a table in a Word document.
Step 1 − Click the Insert tab followed by the Table button. This will display a simple grid as shown below. When you move your mouse over the grid cells, it makes a table in the table that appears in the document. You can make your table having the desired number of rows and columns.
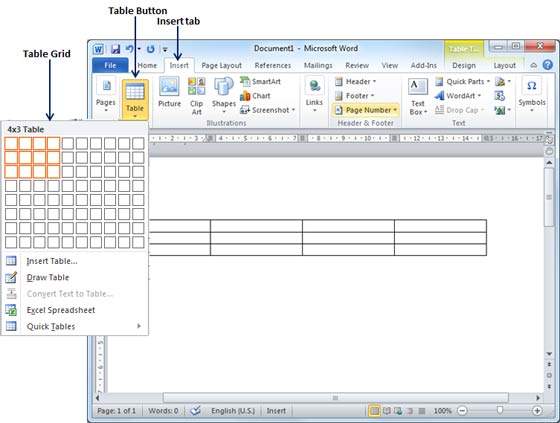
Step 2 − Click the square representing the lower-right corner of your table, which will create an actual table in your document and Word goes in the table design mode. The table design mode has many options to work with as shown below.
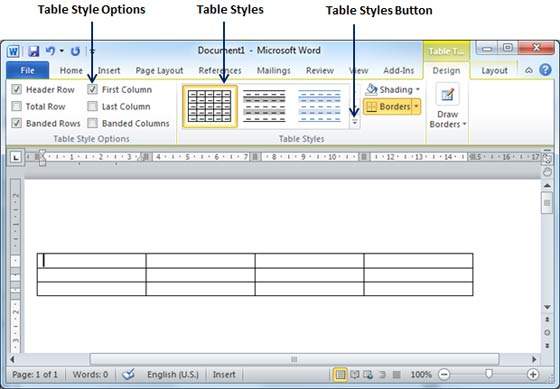
Step 3 − This is an optional step that can be worked out if you want to have a fancy table. Click the Table Styles button to display a gallery of table styles. When you move your mouse over any of the styles, it shows real time preview of your actual table.
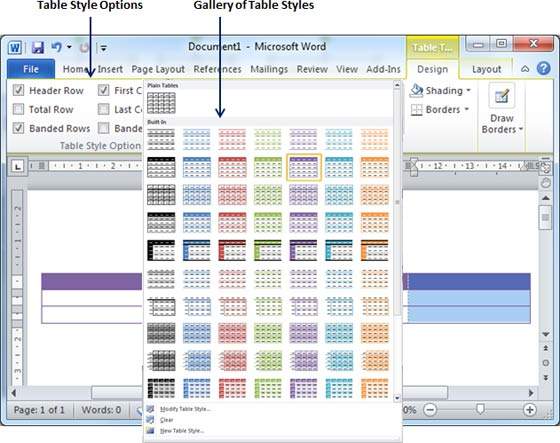
Step 4 − To select any of the styles, just click the built-in table style and you will see that the selected style has been applied on your table.

Delete a Table
Following are the simple steps to delete an existing table from a word document.
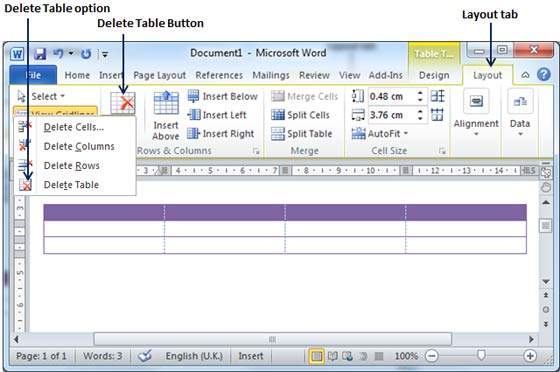
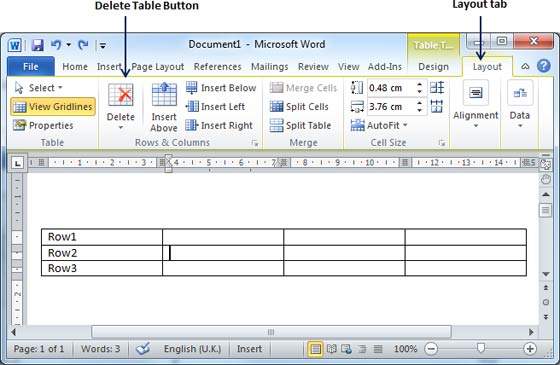
Step 1 − Click anywhere in the table you want to delete.
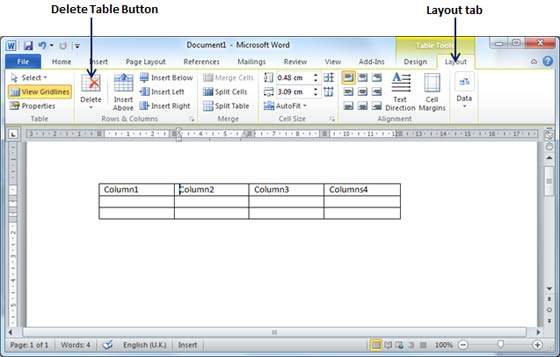
Step 2 − Click the Layout tab, and click the Delete Table option under the Delete Table Button to delete the complete table from the document along with its content.
Rows & Columns
In this chapter, we will discuss how to work with rows and columns in Word 2010. As discussed in the previous chapter, a table is a structure of vertical columns and horizontal rows with a cell at every intersection. A Word table can contain as many as 63 columns but the number of rows is unlimited. This chapter will teach you how to add and delete rows and columns in a table.
Add a Row
Following are the simple steps to add rows in a table of a word document.
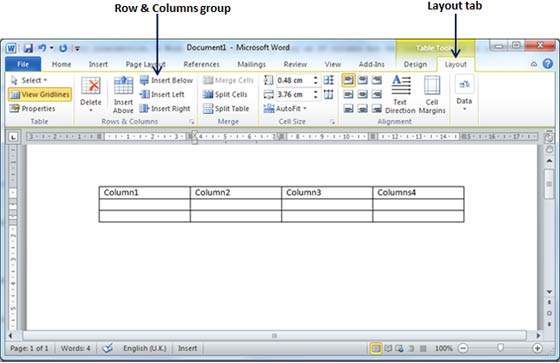
Step 1 − Click a row where you want to add an additional row and then click the Layout tab; it will show the following screen.
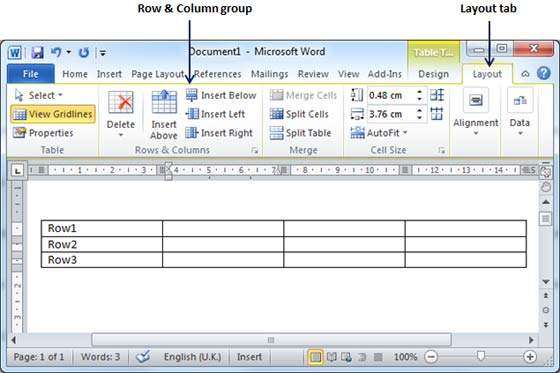
Step 2 − Now use the Row & Column group of buttons to add any row below or above to the selected row. If you click the Insert Below button, it will add a row just below the selected row as follows.
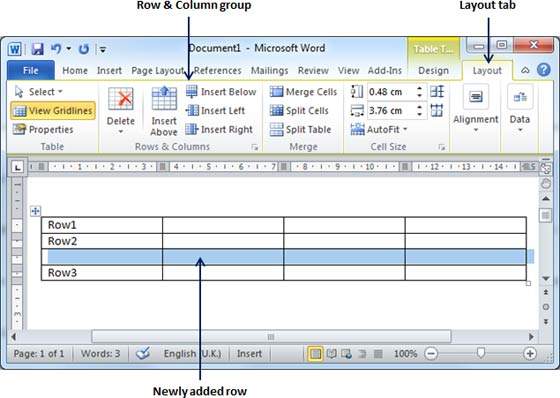
If you click the Insert Above button, it will add a row just above the selected row.
Delete a Row
The following steps will help you delete rows from a table of a Word document.
Step 1 − Click a row which you want to delete from the table and then click the Layout tab; it will show the following screen.
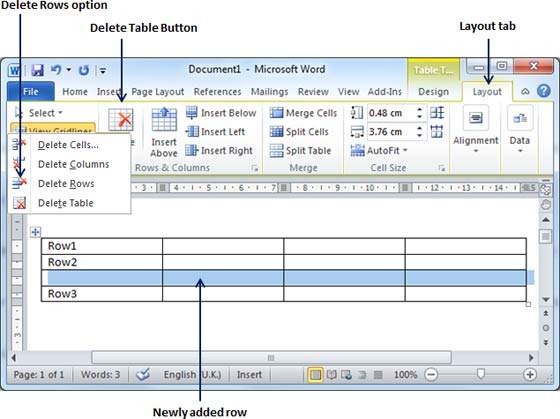
Step 2 − Click the Layout tab, and then click the Delete Rows option under the Delete Table Button to delete the selected row.
Add a Column
The following steps will help you add columns in a table of a Word document.
Step 1 − Click a column where you want to add an additional column and then click the Layout tab; it will show the following screen.
Step 2 − Now use the Row & Column group of buttons to add any column to the left or right of the selected column. If you click the Insert Left button, it will add a column just left to the selected column as follows.
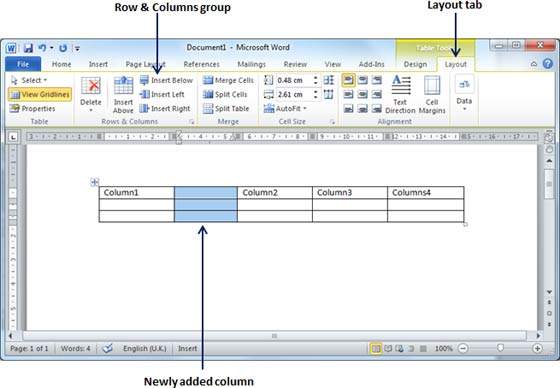
If you click the Insert Right button, it will add a column just next to the selected column.
Delete a Column
Following are the simple steps to delete columns from a table of a word document.
Step 1 − Click a column which you want to delete from the table and then click the Layout tab; it will show the following screen.
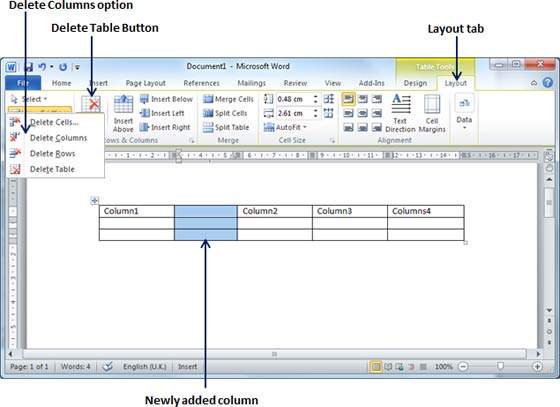
Step 2 − Click the Layout tab, and click the Delete Column option under the Delete Table Button to delete the selected column.
Microsoft Word allows the merging of two or more cells to create one large cell. You will frequently need to merge columns of the top row to create the title of the table. You can merge cells either row-wise or column-wise, rather you cannot merge cells diagonally. This chapter will teach you how to merge multiple rows or columns.
Merging Cells
The following steps will help you merge table cells in a Word document.
Step 1 − Bring your mouse pointer position inside the first cell that you want to merge. Now press the Shift key and click the cells around the cell which you want to merge into the first cell. This will highlight the cells which you click and they will be ready to be merged.
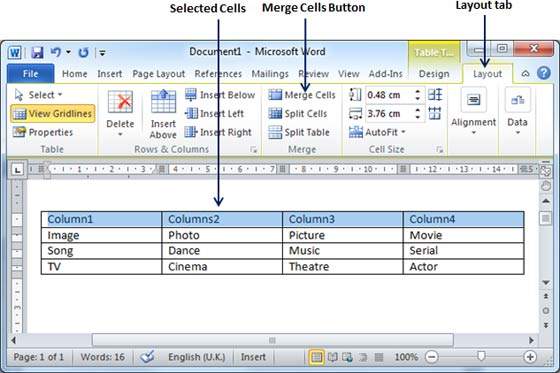
Step 2 − Now click the Layout tab and then click the Merge Cells button which will merge all the selected cells.
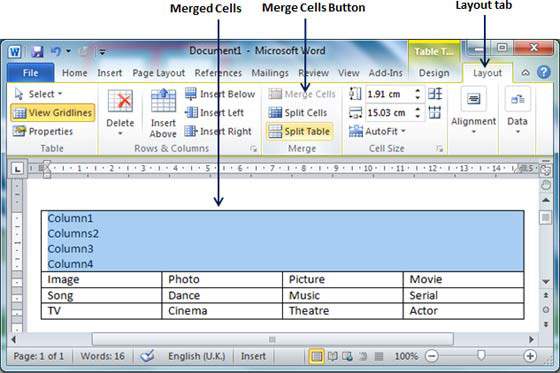
After merging the cells, all the content of the cells will be scrambled which you can fix later as you like. For example, you can convert the merged cells text into title or some other description. For example, let us have center-aligned and bigger font text as follows on top of the table.


good morning ma'am Wayne
ReplyDeleteGood Morning ma'am
ReplyDeleteVeer Pathania 9-G
good morning ma'am
ReplyDeleteishank
Good Morning Ma'am
ReplyDeleteGood morning ma'am aayush 9G
ReplyDeleteGood Morning am'am
ReplyDeleteVeer Pathania 9-G