Formatting - Text Stetting + decoration
Good Morning dear students
The Google meet ID for today's session is:
By the end
of the session, you will be able to understand the steps to do the following in
MS Word:
----- Apply
basic text style, size, shrink/grow, and
clear formatting
----Apply
text decorations- Bold, italics, underline, strike through
--------------------------------------------------------------------------------------------------------------------- Now we continue our learning of text editing software Microsoft Word further.
Setting Text Fonts in Word
By the end
of the session, you will be able to understand the steps to do the following in
MS Word:
----- Apply
basic text style, size, shrink/grow, and
clear formatting
----Apply
text decorations- Bold, italics, underline, strike through
Setting Text Fonts in Word
- In this session, we will discuss how to set the text fonts and size in MS Word.
- Microsoft word allows you to use different fonts with different size.
- You can change your document's appearance by changing the fonts and their size.
- Usually you use different fonts for paragraphs and headings. It is important to learn how to use different fonts.
- Let us learn how to change a font and its size in simple steps.
Change the Font Type & Size
Following is a screenshot to show you a few font related buttons.
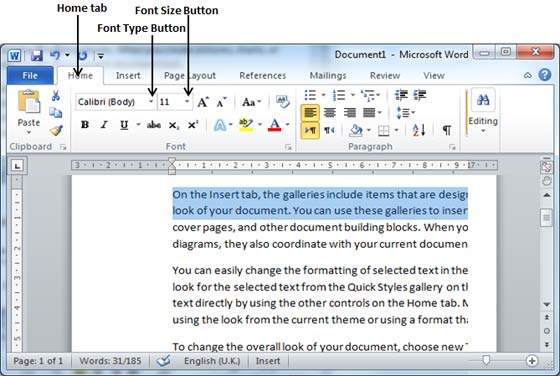
Step 1 − Select the portion of text the font of which needs to be changed and click the Home tab. Now click the Font Type button to list down all the fonts available as shown below.

Step 2 −
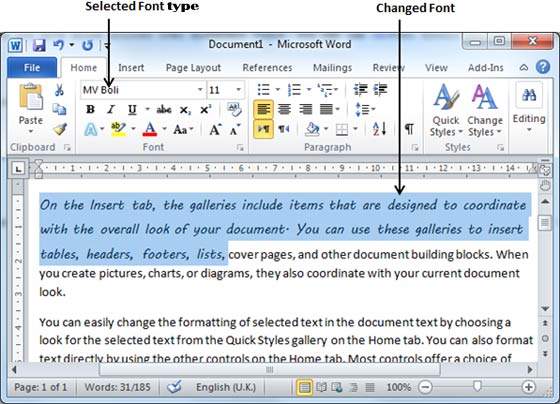
- Try to move the mouse pointer over the listed fonts. You will see that the text font changes when you move the mouse pointer over different fonts.
- You can use the Font Scroll Bar to display more fonts available.
- Finally select a desired font by clicking over the font name in the list.
- We have selected MV Boli as the font for our sample text.
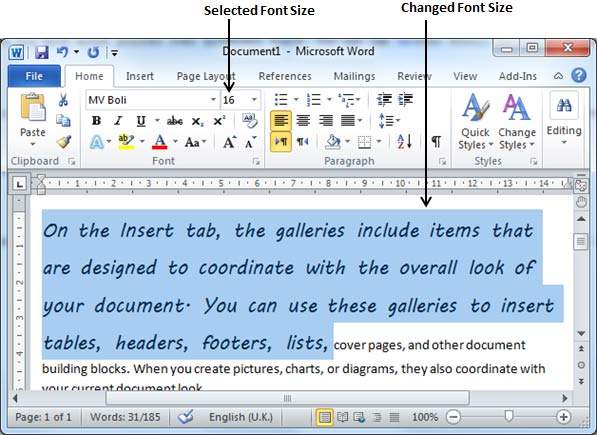
Step 3 − Similar way, to change the font size, click over the Font Size button which will display a font size list.You will use the same procedure to select a desired font size that you have used while selecting a font type.
Use Shrink and Grow Buttons
You can use a quick way to reduce or enlarge the font size. As shown in the first screenshot, the Shrink Font button can be used to reduce the font size whereas the Grow Font button can be used to enlarge the font size.
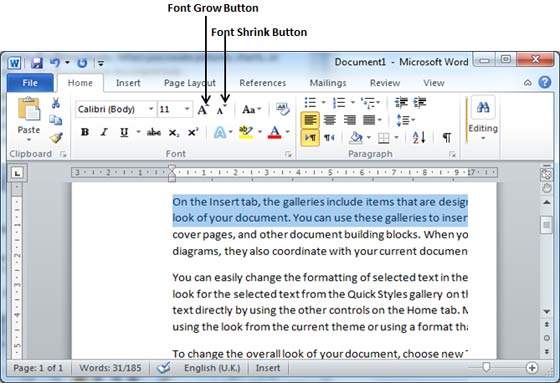
Try to click either of these two buttons and you will see the effect. You can click a single button multiple times to apply the effect. Each time you click either of the buttons, it will enlarge or reduce the font size by 1 point.
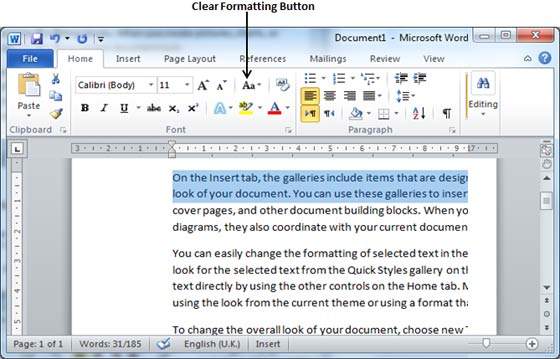
Clear Formatting Options
All of the setting can be reset to plain text, or the default formatting. To reset text to default settings −
Step 1 − Select the portion of text that you want to reset.
Step 2 − Click the Clear Formatting button in the Home tab Font group, or simply use Ctrl + SPACEBAR.
In this chapter, we will discuss text decoration in Word 2010. When we use the term decorate, it means decorate by putting the text in italics, underlining the text or making it bold to look more fancy and much more. In this chapter, we will also learn how we can strike through a text.
Text Decoration in Word
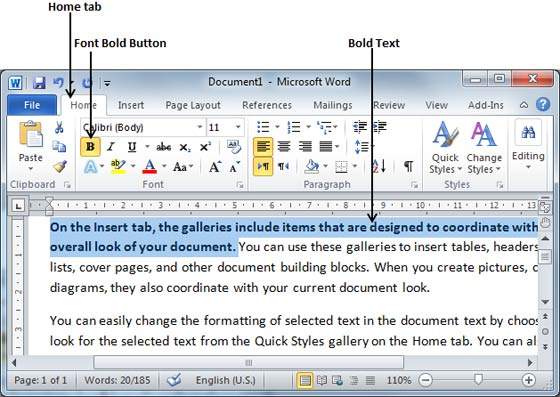
Making text bold
We use bold text to give more emphasis on the sentence. It is very simple to change a selected portion of text into bold font by following two simple steps −
Step 1 − Select the portion of text that the font of which needs to be made bold. You can use any of the text selection methods to select the portion of text.
Step 2 − Click the Font Bold [ B ] button in the Home tab Font group, or simply use Ctrl + B keys to make the selected portion of text bold.
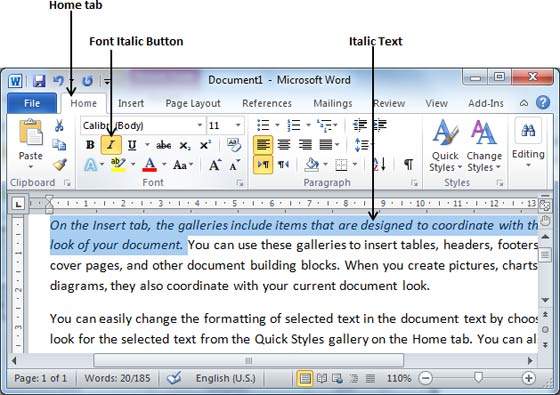
Making Text Italic
An italic text appears with a small inclination and we use the italicized text to differentiate it from other text. It is very simple to change the selected text into italic font by following two simple steps −
Step 1 − Select the portion of text the font of which needs to be italicized. You can use any of the text selection methods to select the portion of text.
Step 2 − Click the Font Italic [ I ] button in the Home tab Font group, or simply use the Ctrl + I keys to convert the portion of text in italic font.
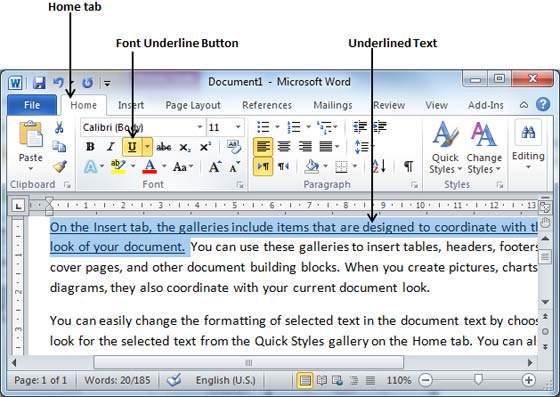
Underline the Text
An underlined portion of text appears with an underline and we use the underlined portion of text to make it more distinguished from other text. It is very simple to change the selected text into underlined font by following two simple steps −
Step 1 − Select the portion of text which needs to be underlined. You can use any of the text selection method to select the portion of text.
Step 2 − Click Font Underline [ U ] button in the Home tab Font group, or simply use the Ctrl + U keys to put an underline under the text.
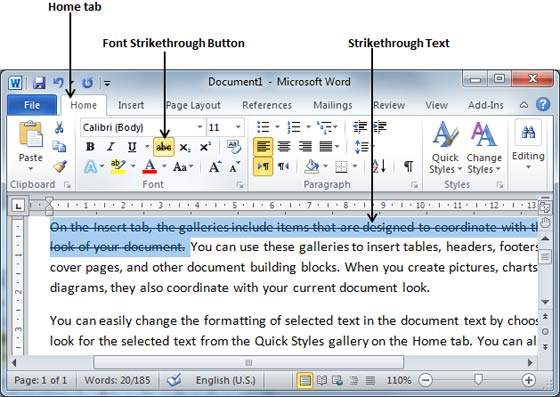
Strikethrough the Text
Strikethrough portion of text will look as if a line has been drawn through the middle of it. A strikethrough portion of text indicates that it has been deleted and that the portion of text is not required any more. It is very simple to change a selected portion of text into a strikethrough portion of text by following two simple steps −
Step 1 − Select the portion of text that you want to change to a bold font. You can use any of the text selection method to select the portion of text.
Step 2 − Click Font Strikethrough [ abc ] button in the Home tab Font group to put a line in the middle of the text which is called strikethrough the text.
EXERCISE
Write the steps to do the following:
1. change font style from one to the other
2. change font size
3. Grow or shrink the text
4. clear all the formatting applied on a text
5. make the selected text bold
6. Italicize the selected text
7. Underline the selected text
8. make the selected text bold.
9. strikethrough the selected text


Good morning ma'am aayush 9G
ReplyDeleteGood Morning ma'am
ReplyDeleteVeer Pathania 9-G
Good Morning Ma'am Sanskar
ReplyDeleteGood morning ma'am Wayne
ReplyDelete